Automating Inspection

The direction of the industry has been for years: improve finish and decrease the tolerance. This responsibility historically has fallen on the CNC machines’. But, in recent years the equipment has improved through design, technology, and tooling to a point where it takes considerably more time to measure than the product takes to machine. Additionally, classical CMM probe measurements can have significant error. Compounding this problem is the requirement of adding 100% inspection to critical dimensions for many customers. The inspection workload has increased significantly, thereby requiring the need for better and high speed inspection.
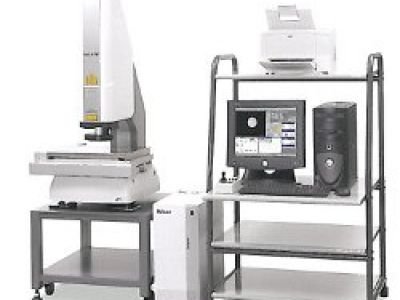
Nikon NEXIV VMR-3020 CNC Video Measuring System- These systems are typically supplemented with 4 axis rotary tables for measurements of machined parts, but they were also developed with wafer carrier for measuring Integrated Circuits (ICs). Many magnification ranges are available. Protomatic selected the 18X-270X adjustable zoom version.
3D Image Scanning is available on the NEXIV- Special software provides point cloud and nurb conversion. This can then be compared to the solid model as a visual comparison (not shown).
Nikon is known for their optics, and the TTL laser (Through The Lens Laser), provides not only high resolution optics but state of the art technology capable of a linear uncertainty of U1x of 1.5 uM +4L/1000um. This is on the order of 4 times better than an average CMM.
Adding New Capability
Protomatic is adding a CNC Video Measuring System to improve measurements of simple 2D parts and complex prismatic parts. Our goal is to decrease measurement time for all parts and this is the best tool to accomplish the task.
What can it do?
This machine simply measures small parts (11″ x 7″ x 5″) very accurately. Using vision system methods combines the precison optics and lasers. This combination enhances accuracy for increased productivity utilizing software algorithms such as Auto Position Search (APS), Multi-Pattern Search (MPS) and Pattern Matching Measurments (PMM). For more infomation see www.nikon.com
Future
Protomatic will continue to invest in state of the art hand gages, probing and scanning probe type CMMs. But, it is always nice to have a new tool in the tool box which will reduce product inspection time and increase accuracy helping us and our customers stay competitive in the industry. We are all excited in learning to program the new machine, which is scheduled to be installed in Nov. 2010.


