For Precision CNC Machining, Protomatic Lights the Way

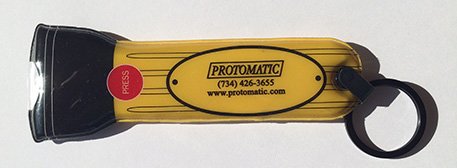
Everyone will be looking up on Monday, August 21, when the Great American Eclipse sweeps across the United States. Since we at Protomatic know a thing or two about light (we use a variety of light from microscopic deburring to laser marking), we want to pass along some interesting eclipse tidbits. And as our way of commemorating the event, we’ll give you a free flashlight with every order.*
Eclipse fun facts:
- It takes 90 minutes for the eclipse to make its way across the entire continent.
- The longest anyone, anywhere, will be able to witness the “totality” of the eclipse is 2 minutes and 40 seconds.
- The last coast-to-coast solar eclipse in the U.S. was 99 years ago.
- In a total eclipse, the moon’s shadow flies across earth at 1.5 times the speed of sound.
- Your pet may be confused in the darkness of a total eclipse, think it’s nighttime, and begin their evening rituals.
Now that you know a little more about the solar eclipse (be sure to wear protective dark glasses if you want to watch it), we’d like to shed some light on why light is such an important part our machining process.
Protomatic uses light with “Life-Saving Precision.”
Following are some of the ways Protomatic uses light to meet the most demanding quality specifications and standards:
- Microscope — 5-100X microscope to deburr and inspect parts for flaws.
- Optical Comparator — a precision projector that measures the shadow of parts to a resolution of 1 ten thousandth of an inch (0.0001’’). Critical for quick and precise inspection of details that are difficult to measure with a Coordinate Measurement Machine (CMM).
- Machine Alignment Lasers — used for leveling and alignment, from machine to machine or initial setup of the CNC machine.
- Optical Flats — a precision lapped disk that can measure flatness. Monochrome light can be used to measure the flatness of parts to fractions of a wavelength of light using an optical flat.
- Fluorescent Dye Penetrant — this sprayed-on chemical is used to enhance the detection of material cracks, with Ultra Violet light (UV).
- CNC Machines — Renishaw NC4 or TRS2 use a laser beam to create a non-contact tool setter and broken tool detector. This is useful for “lights out” operation where diameter detection or a broken tool detection is required.
- Laser Micrometer — laser light is culminated to create parallel beams of light (photons). The part to be measured creates a shadow that is measured on a high precision camera sensor array. This creates a resolution to 1 micro inch, that is useful for measuring pin gages and parts.
- 3D Microscope — measure part topography that would otherwise require destructive testing procedures. They are a high-performance microscope and vision system as well.
- Vision Systems — using lasers and white light, these high accuracy digital cameras measure two dimensional parts, the 3rd dimension is measured with a laser beam at a slight angle. The intense light is reflected and measured with an angular detector. This is used to detect the depth of holes and surface features.
- Laser Marking — 1064nm IR, 4-axis laser marking for metals. The 4th axis is for ring marking around tubes or projections that require rotation.
We hope you enjoy viewing the solar eclipse phenomenon on August 21. As always, Protomatic won’t leave you in the dark. Order your precision CNC parts now and we’ll include a free flashlight*.
*While supplies last.

For more information about the lasers and machines used by Protomatic, and how we bring the highest quality to our customers, please contact Doug Wetzel, Vice President & General Manager, at Doug@Protomatic.com or 734-426-3655.
About the author: Doug Wetzel is Vice President and General Manager of Protomatic. Protomatic is a CNC precision machining shop specializing in prototype and short-run production components for the medical, aerospace and other technical industries. Because of the critical nature of the parts they design and manufacture, the emphasis is always on Life-Saving Precision.


