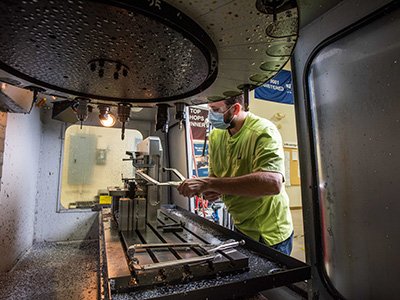
Life-Saving Precision is in the Details

At Protomatic, “Life-Saving Precision” is the bar we set for every component we support and manufacture. Whether for medical or aerospace, we know that our parts can save lives. So we’re not just demanding about details. We’re obsessive.
X-ray vision
It begins with making sure the materials we receive are what we ordered and the material certification matches. To verify that there was no mix-up in the supplier’s shipping process, Protomatic uses X-Ray Fluorescence (XRF) inspection upon receiving to determine the chemistry of all received material. This device tests the actual metal alloy. This is then confirmed with the shipper and mill certification to prevent a mistake.
How is this done?
XRF analyzers measure the fluorescent (or secondary) X-ray emitted from a sample when it is excited by a primary X-ray source. This spectral response is then used to determine the specific alloy’s elemental mix and then compared to alloy tables to report the actual alloy.
Check, double-check
Another step in the process is to create a detailed process sheet. Here, we plan for and measure each characteristic (dimension) to make sure parts are acceptable at an agreed quality limit (AQL) sampling level. These measurements are checked at a defined sampling interval, as well as events like at every shift change, process adjustment, or special event. A special event like a power surge or outage (rain/ice/wind/heat event) may cause the machine to need to be reset or partially reset, which can create an incomplete feature during the machining cycle. Protomatic has special electronic circuitry within most machines called “Early Power-Failure Detection.” The CNC machine tool then minimizes these events.
Measuring and R&R
One of the more difficult areas in manufacturing precision parts is related to “accuracy and precision” of the measuring instrument. As many industries demand increasingly more precise parts, finishes are critical. Material characteristics like CTE (Coefficient of Thermal Expansion), hardness, coating thicknesses, temperature of the measurement create more product variations and difficulty of measurements. So we employ standard and more extreme methods in the pursuit of precision parts.
10 times better, the standard method
Protomatic maximizes measurements with the most accurate instruments possible. The common rule of thumb is that the measuring instrument must be 10x more precise than the feature tolerance on the part being measured (This is known as the 10% rule). That means that if a part tolerance is within 0.001″, the instrument measuring it must be capable of at least 0.0001″.
No relaxing with this R&R, more extreme method
To further enhance measurement accuracy, we use a technique called R&R — Reliability and Repeatability. Reliability calls for maintaining the level of quality over time. Repeatability means the system design must produce the same high-quality product time after time. This is important because systems that do not meet Repeatability standards often produce scattered results.
The R&R method
R&R requires that multiple parts (typically 10) are measured with multiple operators (typically 3), all to be measured using the same instrument. The goal at Protomatic is to determine the instruments’ R&R value. With this information, we can determine the measurement’s uncertainty. The goal is for a less than 10% R&R. Over the years, we have seen that many instruments may not meet the criteria. So, control limits then can be set to provide acceptance criteria. This assures a high degree of confidence that we will always ship acceptable parts.
Protomatic measures up
Protomatic is committed to meeting and exceeding the highest standards of quality in everything we do. It’s the only way we know to constantly provide our customers with components designed and made with Life-Saving Precision. For more information, please contact our VP/General Manager, Doug Wetzel: Doug@Protomatic.com.
About the author: Doug Wetzel is Vice President and General Manager of Protomatic. Protomatic is a CNC precision machining shop specializing in prototype and short-run production components for the medical, aerospace and other technical industries. Because of the critical nature of the parts they design and manufacture, the emphasis is always on Life-Saving Precision.


