Preventive Machine Maintenance

This month Protomatic is highlighting an extremely important but often dismissed activity that is critical to manufacturing precision parts. That activity is preventative maintenance (PM). This area of our business focus is critical to creating the best price for our customers as it insures that a good part will be manufactured the first time and every time.
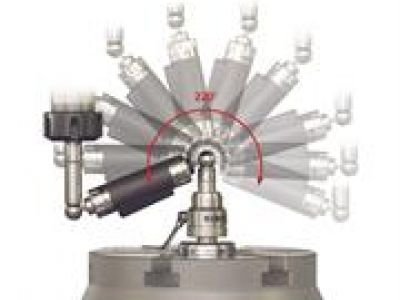
The Renishaw ball bar tester (Model QC20-W), transmits the distance between the two mounting balls when the CNC machine is programmed to produce an ideal circle. Typically measuring in all planes, X-Y, Z-X, and Y-Z. This is a great benchmark device, but is only one tool to measure performance of the machine tool. Additional tools include precision levels, laser interferometers and rotary encoders.
This graph represents the Z-X performance of a typical CNC VMC. The two measurements represent Counter Clockwise and Clockwise measurements when the machine was programmed for an idea circle at 50ipm (typical machining speed). The measurement should ideally be a perfect circle. It was not, so we corrected the lateral play, squareness, lead screw backlash or other properties of the machine.
This graph is a measurement of a corrected machine shown in the same scale (0.0005”). It originally demonstrated a circularity error of 0.0041”. The adjustments improved overall machine accuracy and now has an error of only 0.00053”. This is a significant performance improvement which translates into better part accuracy for our customers.
Machining Blind
Most shops run blind in that they do not have the desire or expertise to measure and correct their machine accuracy. The equipment required to measure machine accuracy is expensive as is the labor spent to measure a machine. Then, the talent is needed to have an understanding of how to correct the machine. Probably the greatest cost is the downtime to correct the machine. Machines may need encoders, remapping or replacing ball screws, squaring, leveling and even spindles. These are not inexpensive items to measure or repair. But, this process is necessary to ensure quality parts.
Machine Verification
At Protomatic, due to age (wear) of machines or accidental overloading (AKA, the rare crash) machines must be verified periodically. Protomatic uses the Renishaw Ball Bar Tester model QC20-W for this critical verification. Measurements are conducted and evaluated with software provided by Renishaw that helps to identify causes of the various types of machine errors. This information helps us to systematically correct and improve each machine so they produce at new performance levels. The graphs shown to the left demonstrate the insight and reason that machines need to be verified and corrected. The center graph shows a typical machine before and the lower shows a machine after the improvement process.
Interpretation
The measurements are very small with a resolution of 0.1 micron. Also, circularity error is only one measurement and the values do not always relate to ball screw linearity or machine errors. CNC machines usually repeat very consistently and machine errors are identified by product inspection equipment such as our CMMs or our high resolution vision systems. Machine programing can be used to compensate known issues by controlling hysteresis characteristics.


